
External Flash Basics
- Nov 30, 2017
- 5 min read
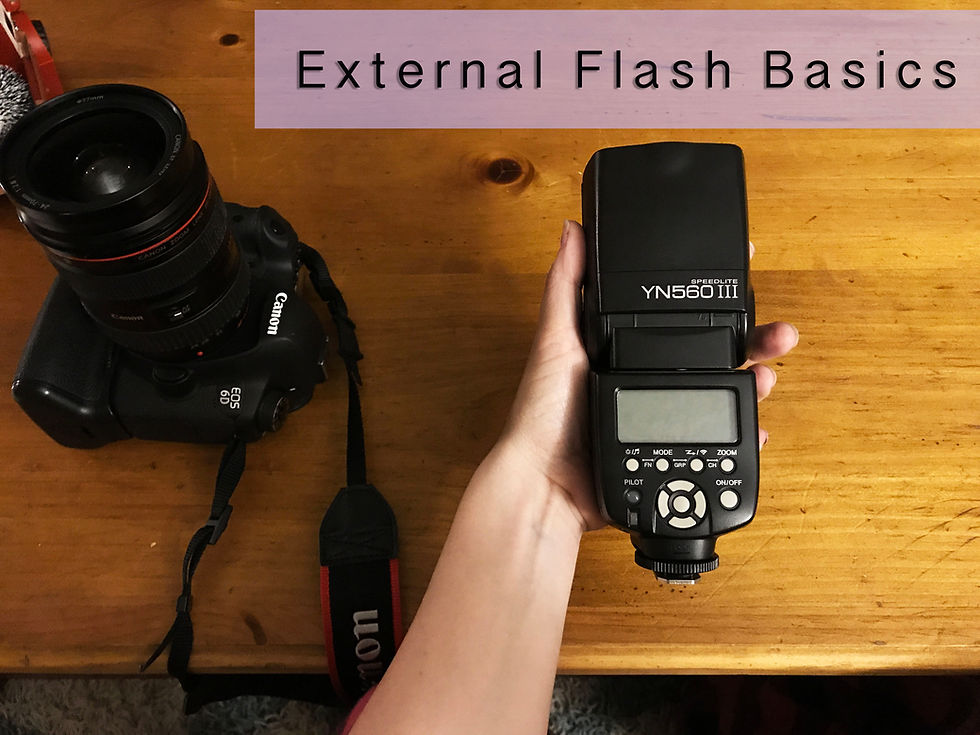
Fun fact about myself: I hate using camera gear if I don't need it. Simplicity is so important to me, so if I can stick to just a camera body and one lens for an entire shoot I am a happy camper! But honestly, sometimes you need a little extra help. When that time comes it is important to feel comfortable grabbing for that flash out of your camera bag and getting the job done. To be frank, I am no expert on using flash. I know the bare minimum. But even that has helped me get out of some tricky situations. So with the few tips I do have I hope to save you in those tricky situations as well.
First, let's check out my flash and the very very minimal knowledge I have of it!
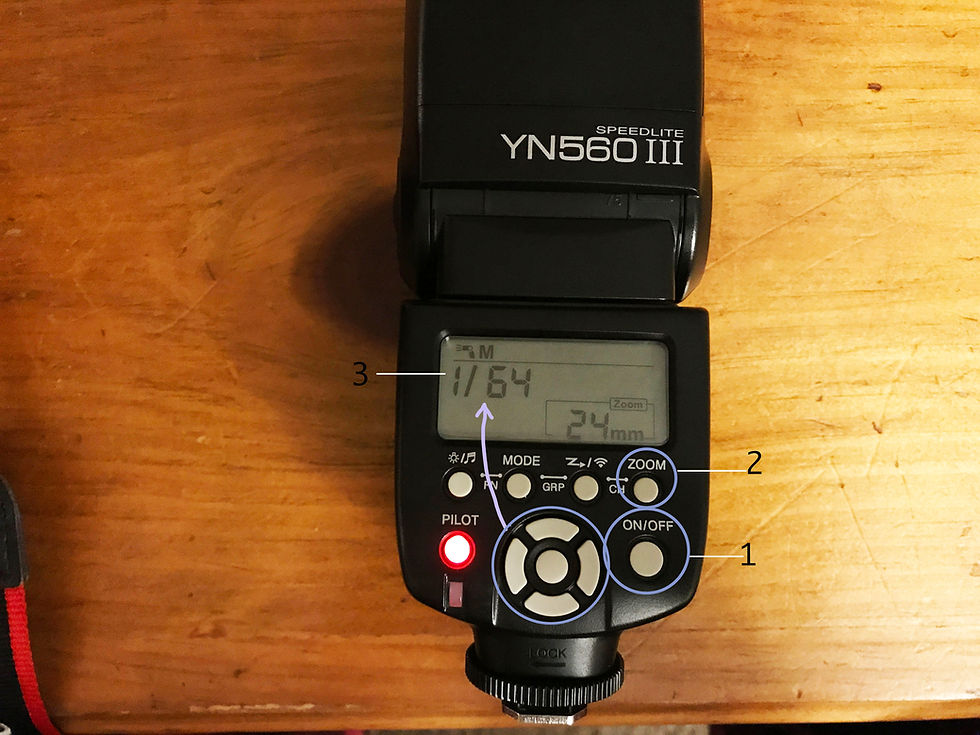
You will notice they give you an overwhelming amount of buttons and settings to work with. I only use the following buttons and settings on this sucker.
1. Power (on/off)
Hey, we gotta start somewhere. Use this button to turn your flash on or off. Simple!
2. Zoom
I have no clue how it works, but it does. In my experience, this is a way to kind of control what the flash "focuses" on. The more zoomed out the flash, the more illuminated your entire photo will be. The more you zoom, the more the flash will illuminate the subject in front of you.

3. Intensity
This controls a fraction (gosh I hate numbers). My intensity ranges from 1/1 to 1/128.
1/1 is a full intensity flash and 1/128 is the least intense mine will get. This is going to be a really "captain obvious" answer, but I think wording it this way helps: anything that isn't the full 1/1 is going to be a fraction of full flash.
1/1 = very intense
1/4 = pretty intense
1/64 = moderate
1/128 = least intense
You get the picture! 📸
These are the only things I feel comfortable working with at the moment. When I get brave and venture to the other capabilities of flash, I will share with you!
Bounce
The most beneficial technique I want to share with you regarding flash is bouncing.
I believe most external flash units let you rotate and angle the direction of the light. For this post, I just want to show you the changes that come with bouncing off different object.
Why bounce?
The simple answer is that flashing a subject directly can be too harsh. Bouncing your flash off of something allows you to light your subject in a more natural-looking manner.
Now, depending on where you bounce your flash you can give your photo a totally different mood. So, like always, my recommendation is to experiment and play around with it yourself! That is definitely the best way to get the hang of it. But for now, check out these examples (I have added captions under each to explain where the flash was bounced).
Examples
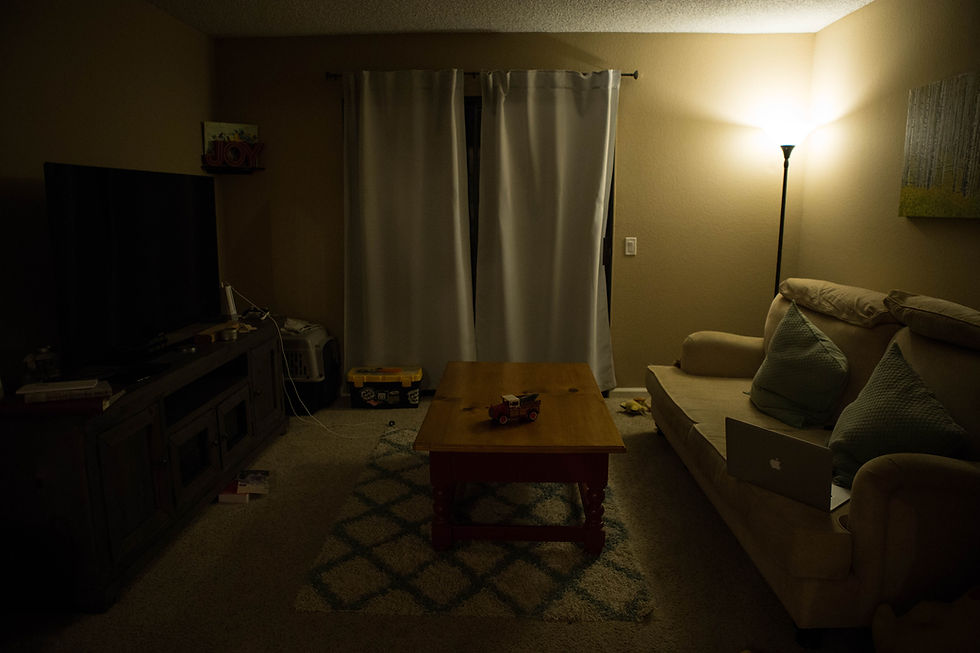
This is how my room was setup - it was a pretty low lit room with just a lamp on (pictured) and a kitchen light around the corner behind me. Let's see what I got!
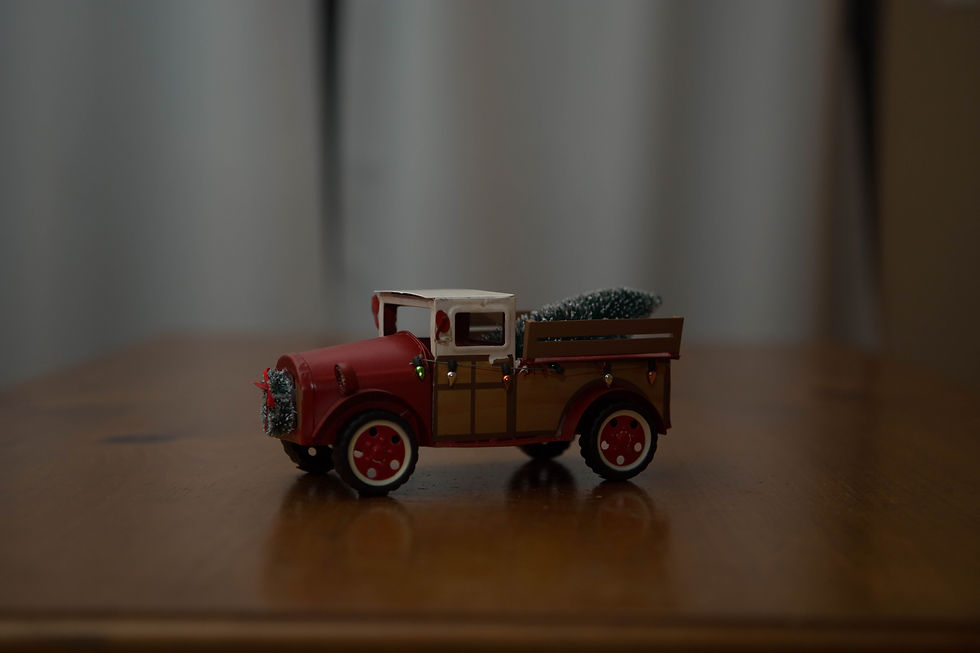
Where was the bounce?
Above you'll see what my subject looked like with direct flash. As you can see, images that are directly lit tend to be washed out, even with flash settings at their lowest intensity.
Flash settings: 1/128 strength, 24mm zoom.
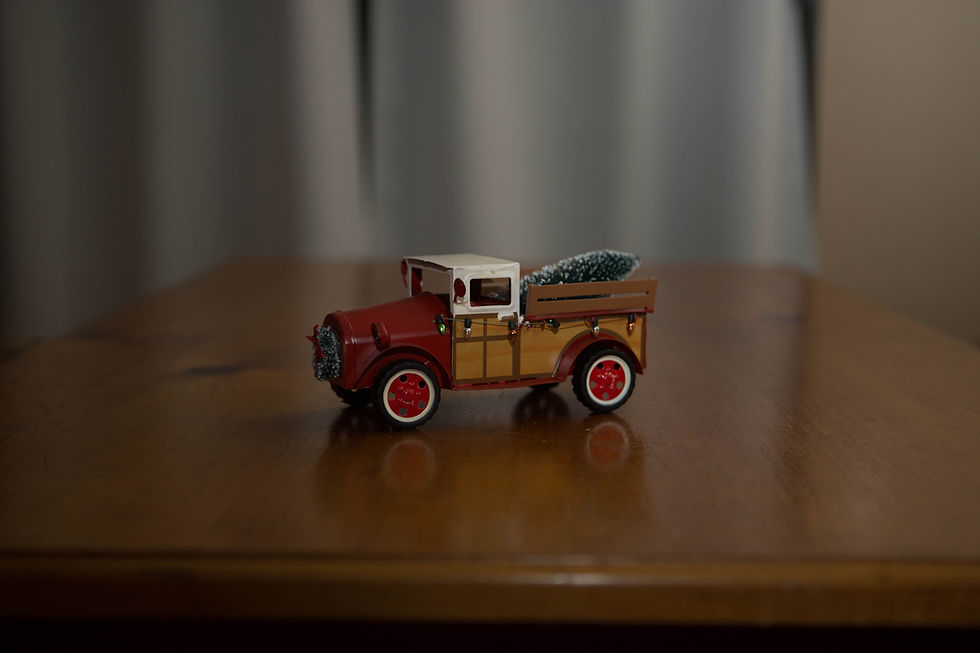
Where was the bounce?
Here is my subject with the flash bounced off the wall to my left. The subject is not washed out and has a softer look all thanks to the bounce! You will notice my flash was set a little stronger and that is because the wall was further away. I wanted enough light to reflect off the wall so I bumped it up a notch. Even though I did this, the flash is still not as overpowering as it was when it was directly on the subject.
Flash settings: 1/64 strength, 24mm zoom.
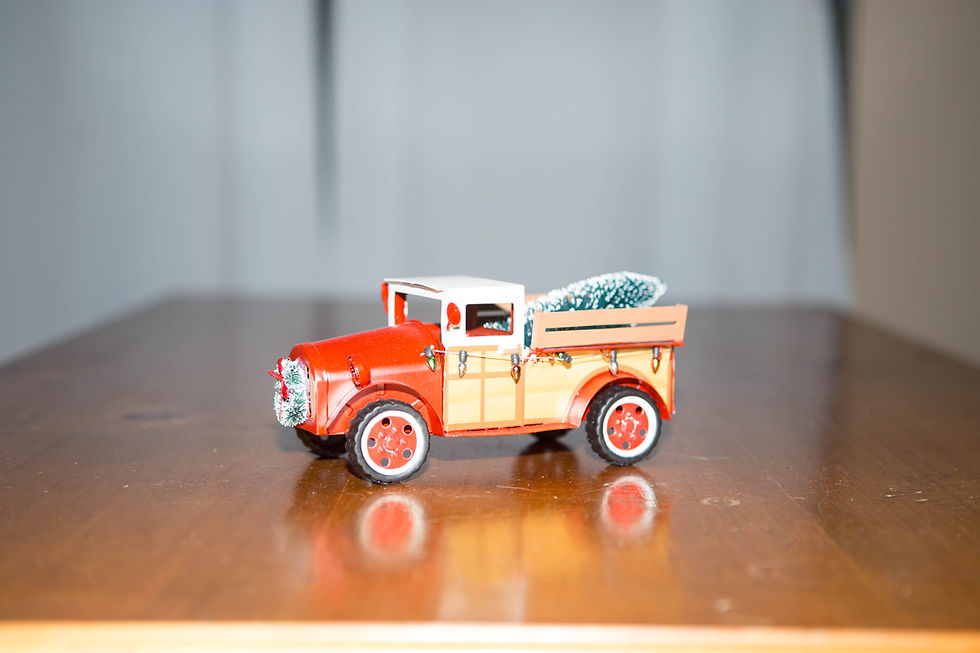
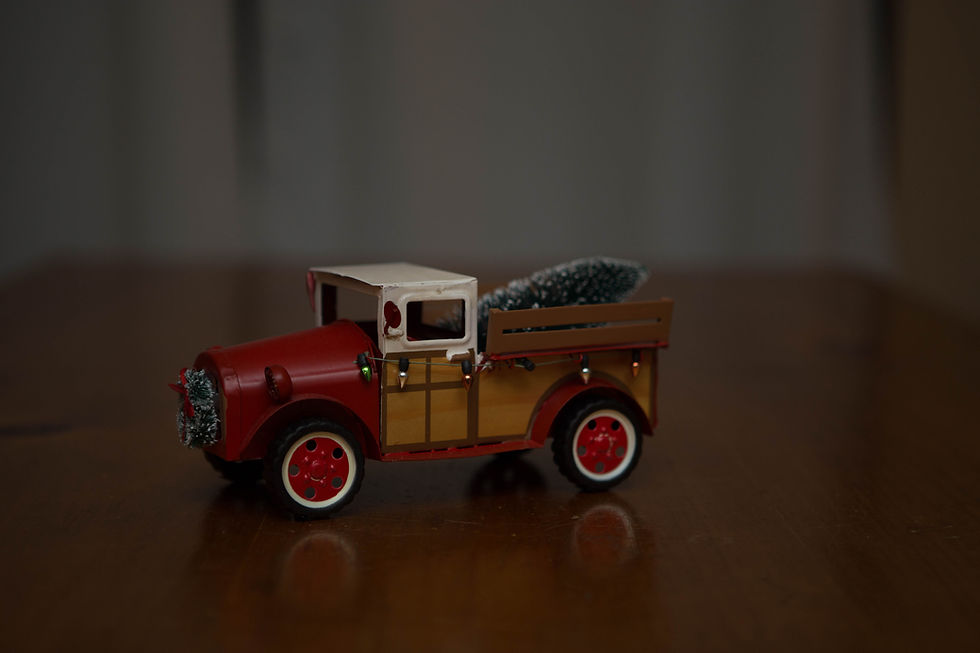
Where was the bounce?
In this setup, the bounce was off of the wall to my right. Similar look to the setup before it, but the point is you can make these adjustments quickly to light your subject the way you want during a shoot.
Flash settings: 1/64 strength, 50mm zoom.
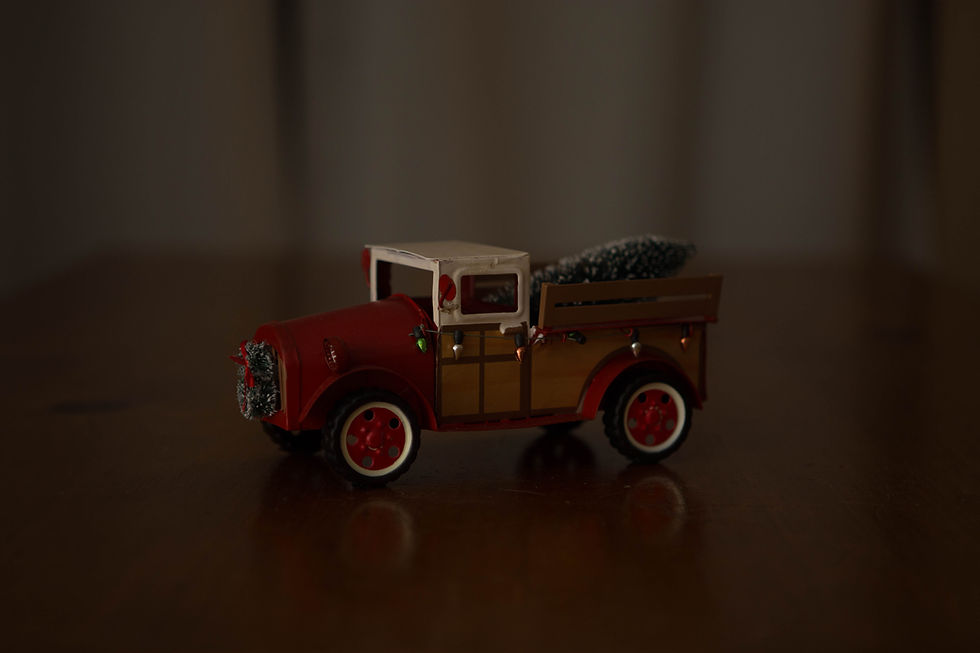
Where was the bounce?
This one is a little different! Can you guess where the flash came from? If you guessed it was coming from behind or above me, you would be right! Yep, this one was bounced from a small ledge in the ceiling behind where I was sitting. My flash was turned completely around and tilted down about 30 degrees. Bouncing your flash off the ceiling or behind you leads to some of the best results!
Side Note: I recommend trying to bounce from above as much as possible, since that is where the sun or indoor lighting will be in a real-life situation.
Flash Settings: 1/64 strength, 50mm.
Where was the bounce?
Alright, what about this one? This time, the flash was bounced off a wall behind me and to my left. It is a bounce I almost didn't try, but when I did I was really happy with the result! I personally thought this was the best of my mini-shoot. A little editing and I think I will throw it on my Instagram!
Flash Settings: 1/16 strength, 50mm.
Which bounce was your favorite?
Let me know in the comments!
I have some more basics to share with you but want to end this post here so you aren't too overloaded with information. For now, try familiarizing yourself with your external flash and experiment with the lighting effects you get by bouncing your flash around. If you have specific questions, just ask! I am here to help as much as I can. Until next time!
Important Quick Tips
• I recommend trying to bounce from above as much as possible, since that is where the sun or indoor lighting will be in a real-life situation.
• Remember that when you are shooting in low light conditions, not only is your camera going to need to work harder - you do too. Your vision starts to be impaired if lights are too dim, so you'll need to triple check that your photos are sharp and in focus (at least for the must-have shots)
• I know there is a reason behind this but I can't remember. Either way keep this in your mind!
Your camera and flash might not sync up if you go above 1/200 or 1/250 shutter speed. If I shoot above 1/200 shutter speed with my flash on, I start to get black bars on the sides of my screen. If you are noticing that half of your photo is not exposed or that there is a black bar down the side of your camera screen, you will want to reduce your shutter speed. This should fix the problem.


Comments